


In the dynamic landscape of the digital world, having a website is no longer a luxury; it’s a necessity. The good news is that you don’t need to be a coding wizard to bring your online vision to life. With the advent of user-friendly Quick Install Tools, you can embark on a DIY journey to create your website without breaking a sweat. In this blog post, we’ll walk you through the process, empowering you to craft your digital haven with confidence.
What are Quick Install Tools?
Quick Install Tools are powerful allies in your quest to build a website. These tools are designed with simplicity in mind, enabling even those with limited technical know-how to set up a website efficiently. From website builders to content management systems (CMS), Quick Install Tools provide the framework you need to get started.
Step 1: Choose Your Platform
The first step is selecting the platform that suits your needs. WordPress, Joomla, Drupal, and many other platforms are available. These platforms offer pre-designed templates, themes, and plugins that simplify the creation process.
Step 2: Select a Hosting Provider
To unleash the potential of Quick Install Tools, you need a reliable hosting provider that supports these tools. Choose a hosting plan that aligns with your website’s requirements and budget. Many hosting providers offer seamless integration with Quick Install Tools.
Step 3: Access Quick Install Tools
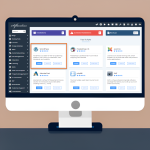
Once you’ve chosen your hosting provider, access the control panel. Within the control panel, you’ll typically find the Quick Install or One-Click Install option. Click on this to enter the realm of efficient website creation.
Step 4: Choose Your Application
In the Quick Install menu, you’ll find a range of applications to choose from. Opt for the platform you’ve decided to use (e.g., WordPress), and the Quick Install Tool will guide you through the setup process.
Step 5: Customize Your Website
With the basic installation complete, it’s time to customize your website. Choose a theme or template that resonates with your brand or vision. Most platforms offer a variety of options to suit different aesthetics.
Step 6: Add Content
Now comes the fun part – adding content! Whether you’re creating pages, writing blog posts, or uploading images, the user-friendly interface of Quick Install Tools makes this process intuitive and hassle-free.
Step 7: Enhance with Plugins and Widgets
Quick Install Tools often provide access to a plethora of plugins and widgets. These powerful add-ons extend your website’s functionality. From contact forms to social media integrations, you can enhance your site without delving into complex coding.
Step 8: Preview and Publish
Before unveiling your creation to the world, take a moment to preview your website. Ensure that everything is in place and that the design aligns with your vision. Once satisfied, hit the publish button, and watch your digital haven come to life.
Step 9: Continuous Refinement
Building a website is not a one-time endeavor; it’s an ongoing process. Use analytics to track user behavior, gather feedback, and continuously refine your website to cater to your audience’s evolving needs.
Conclusion
Quick Install Tools empower you to be the architect of your online presence, even if coding isn’t your forte. With these user-friendly tools, building a website becomes an accessible DIY project that can be undertaken with enthusiasm. Remember, your website is your canvas, and Quick Install Tools are your brush. So, embark on this digital journey, armed with the confidence that you can craft a website that reflects your unique identity and aspirations.