


Congratulations on taking the plunge into the digital realm by purchasing your hosting and setting the stage for your website! Now, it’s time to enter the command center of your online presence – the cPanel. In this blog post, we’ll walk you through the steps to access your cPanel, provide an overview of its powerful tools, and empower you to take control of your website like a pro.
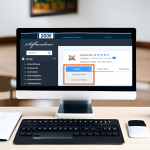
Accessing Your cPanel
- Check Your Welcome Email: Upon purchasing hosting, you should receive a welcome email containing vital information, including your cPanel login details. Keep this email handy.
- Login to Your Hosting Account: Navigate to your hosting provider’s website and log in to your hosting account using the provided credentials.
- Locate the cPanel Option: After logging in, look for the cPanel option. This might be labeled as “cPanel” or “Control Panel” in your dashboard.
- Enter Your Credentials: Click on the cPanel link, and a new window will open prompting you to enter your cPanel username and password from the welcome email.
- Welcome to Your cPanel: Congratulations, you’ve successfully accessed your cPanel – your digital headquarters for website management!
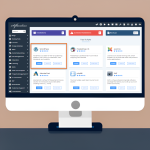
Exploring the cPanel Tools
The cPanel is a treasure trove of tools designed to empower you to manage your website efficiently. Let’s explore some of the key tools and their functions:
- File Manager: Your virtual file cabinet. Use this tool to upload, organize, and manage files on your website.
- Domains: Control your domains, subdomains, and domain redirects. You can also manage domain-related settings here.
- Email Accounts: Create, manage, and organize email accounts associated with your domain. Set up forwarding, autoresponders, and more.
- Databases: Manage your website’s databases, including creating, importing, and backing up databases for applications like WordPress.
- Metrics: Gain insights into your website’s performance. Track visitor statistics, bandwidth usage, error logs, and more.
- Security: Fortify your website’s security by configuring SSL certificates, managing IP blockers, and setting up password protection.
- Software: Install popular applications like WordPress, Joomla, and Drupal using one-click installers. This streamlines the process of adding functionality to your site.
- Backup: Create backups of your website files, databases, and configurations. Regular backups are essential for disaster recovery.
- Preferences: Customize your cPanel experience. Adjust settings like language, contact information, and interface style.
Empowerment Through Familiarization
Navigating your cPanel may feel overwhelming at first, but remember, each tool serves a specific purpose to enhance your website management experience. Spend time exploring each tool, experimenting with settings, and don’t hesitate to consult your hosting provider’s documentation or customer support for guidance.
Conclusion
The cPanel is your command center, giving you the tools to wield control over your website’s destiny. From file management to security configurations, it’s your launchpad for creating, optimizing, and safeguarding your digital presence. As you explore its various features, you’ll gain confidence in managing your website like a seasoned pro. So, embrace the power of the cPanel, and watch your online vision flourish under your skilled guidance.